Indulge in Decadence: The Ultimate Salted Caramel Chocolate Cake Recipe
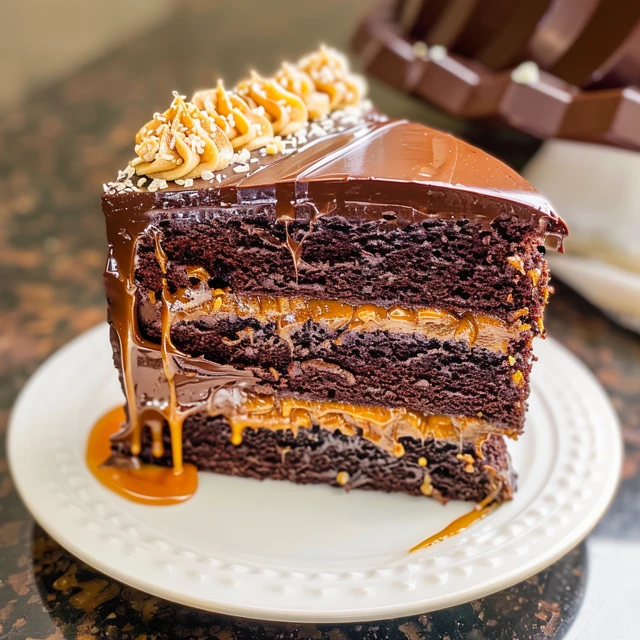
When it comes to decadent desserts, few can rival the luxurious combination of salted caramel and chocolate. This Salted Caramel Chocolate Cake is the epitome of indulgence, boasting three moist layers of rich chocolate cake, slathered in a luscious salted caramel chocolate frosting, and garnished with a final drizzle of salted caramel sauce and a sprinkle of flaky sea salt. It’s a dessert that promises to impress at any gathering, whether it’s a birthday celebration, holiday feast, or simply a treat to satisfy your sweet tooth. Here’s a step-by-step guide to creating this show-stopping cake.

Ingredients and Preparation
To create this masterpiece, you’ll need the following ingredients:
For the Chocolate Cake:
- 2 cups granulated sugar
- 1 cup light brown sugar, packed
- 2 and 3/4 cups all-purpose flour
- 1 and 1/2 cups unsweetened cocoa powder, sifted
- 3 teaspoons baking soda
- 1 and 1/2 teaspoons baking powder
- 1 and 1/4 teaspoons salt
- 3 large eggs + 2 large egg yolks, at room temperature
- 1 and 1/2 cups full-fat sour cream
- 1/3 cup whole milk
- 3/4 cup vegetable oil (or melted coconut oil)
- 2 tablespoons vanilla extract
- 1 and 1/2 cups hot water
For the Salted Caramel Chocolate Frosting:
- 2 cups unsalted butter, very soft
- 4 and 1/2 cups confectioners’ sugar, sifted
- 3/4 cup unsweetened cocoa powder, sifted
- 1 teaspoon vanilla extract
- 1/2 teaspoon salt
- 3 tablespoons heavy cream (more if needed)
- 2 tablespoons salted caramel sauce
Garnish:
- 1 and 1/4 cups salted caramel sauce
- Flaky sea salt
Baking the Cake
Step 1: Preheat and Prepare Pans Preheat your oven to 350°F (175°C). Cut out three 9-inch round segments of parchment paper to line your cake pans. Spray each pan generously with nonstick cooking spray, ensuring the sides and bottom are well-coated. Place the parchment paper cut-outs in the bottom of the pans and spray them again. This step is crucial to prevent your cakes from sticking.
Step 2: Combine Dry Ingredients In the bowl of a stand mixer fitted with the paddle attachment, or in a large bowl using a handheld electric mixer, combine the granulated sugar, brown sugar, flour, cocoa powder, baking soda, baking powder, and salt. Mix on low speed until the dry ingredients are thoroughly combined. If you encounter any large clumps, break them up with your hands.
Step 3: Mix Wet Ingredients In a separate bowl, whisk together the eggs, egg yolks, sour cream, milk, oil, and vanilla extract until completely combined. Pour this mixture into the bowl with the dry ingredients and mix on low speed until just incorporated. Add the hot water and continue mixing until the batter is smooth and fully combined. The batter will be quite thin, but that’s okay.
Step 4: Bake the Cake Layers Divide the batter evenly among the prepared pans. Bake in the preheated oven for 30 minutes, or until a wooden toothpick inserted into the center of a cake comes out clean or with just a few moist crumbs attached. Allow the cakes to cool in the pans for 10 minutes before transferring them to a cooling rack to cool completely.

Making the Frosting
Step 1: Cream the Butter In a stand mixer fitted with the paddle attachment, beat the softened butter on medium speed until completely smooth and creamy, about 3 minutes.
Step 2: Add Dry Ingredients Turn off the mixer and sift the powdered sugar and cocoa powder into the bowl. Turn the mixer on the lowest speed and mix until the sugar and cocoa have been absorbed by the butter, about 2 minutes. Increase the mixer speed to medium and add the vanilla extract, salt, heavy cream, and salted caramel sauce. Beat for an additional 3 minutes. If the frosting is too thick, add more heavy cream, one tablespoon at a time, until the desired consistency is achieved.
Assembling the Cake
Step 1: Level the Cake Layers Using a serrated knife, carefully trim the raised tops of each cake layer to create even, level surfaces. This will ensure your cake stacks neatly.
Step 2: Layer and Frost Place one cake layer on a large plate or cake stand. Spread a thin layer of frosting on top, followed by a 1/2 cup of salted caramel sauce. Add the second cake layer and repeat the process, spreading a thin layer of frosting and another 1/2 cup of caramel. Top with the final cake layer and place the cake in the fridge to set for about 1 hour.
Step 3: Final Frosting Once the cake has set, use the remaining frosting to coat the top and sides of the cake. Sprinkle the top with flaky sea salt for an extra touch of elegance and a delightful contrast to the sweetness of the caramel and chocolate.
Tips for Success
- Room Temperature Ingredients: Ensure that your eggs, egg yolks, and sour cream are at room temperature before mixing. This helps create a smoother batter and more evenly baked cake layers.
- Sift Dry Ingredients: Sifting the cocoa powder and confectioners’ sugar helps prevent lumps in your batter and frosting, resulting in a smoother texture.
- Even Layers: Use a kitchen scale to divide the batter evenly among the cake pans, ensuring consistent layers.
- Chill Time: Don’t skip the chilling step before the final frosting. It helps set the layers, making the cake easier to frost and assemble.
- Storage: The cake can be baked up to 5 days in advance and stored in the refrigerator. Unfrosted cake layers can be wrapped and frozen for up to 2 months. Thaw overnight in the refrigerator before frosting and assembling.
Variations and Customizations
While this Salted Caramel Chocolate Cake is already a decadent treat, there are several ways you can customize it to suit your taste or the occasion.
Adding Crunch
For an added texture contrast, consider incorporating crunchy elements between the layers. Crushed toffee bits, chopped nuts (such as pecans or hazelnuts), or even cookie crumbs can add a delightful crunch that complements the smooth frosting and moist cake.

Different Frosting Flavors
If you want to experiment with different frosting flavors, you can try a salted caramel buttercream instead of the chocolate frosting. Simply omit the cocoa powder and increase the amount of salted caramel sauce in the frosting recipe. This will create a lighter-colored frosting with a more pronounced caramel flavor.
Extra Caramel Drizzle
For an even more indulgent touch, drizzle additional salted caramel sauce over the top of the frosted cake. Allow it to drip down the sides for a visually stunning effect. This extra caramel not only adds to the presentation but also intensifies the caramel flavor with each bite.
Filling Options
You can also experiment with different fillings between the cake layers. For example, a layer of chocolate ganache or a layer of caramel mousse can add a rich and creamy element that enhances the overall decadence of the cake.
Decorating Ideas
Decorating your Salted Caramel Chocolate Cake can be as simple or as elaborate as you like. Here are a few ideas to get you started:
- Chocolate Shavings or Curls: Use a vegetable peeler to create chocolate shavings or curls from a block of chocolate. Scatter these over the top of the cake for a touch of elegance.
- Caramel Drizzle Patterns: Use a piping bag or a spoon to create intricate caramel drizzle patterns on the top of the cake. You can also create a spiral pattern starting from the center and working your way outwards.
- Edible Gold Leaf: For a truly luxurious look, add small pieces of edible gold leaf to the top of the cake. This adds a beautiful, shimmering finish that’s perfect for special occasions.
- Fresh Fruit: Fresh berries or sliced fruit can add a pop of color and a refreshing contrast to the rich flavors of the cake. Strawberries, raspberries, or even figs can be great choices.
Troubleshooting Common Issues
Even with the best-laid plans, sometimes things can go awry in the kitchen. Here are a few common issues you might encounter while making this cake and how to fix them:
Cake Layers Sticking to the Pans
To prevent this, ensure that you thoroughly grease the cake pans and use parchment paper. If a layer does stick, run a knife around the edge of the pan to loosen it before attempting to remove it.
Frosting Too Thick or Thin
If your frosting is too thick, add additional heavy cream, one tablespoon at a time, until it reaches the desired consistency. If it’s too thin, add more confectioners’ sugar, a little at a time, until it thickens up.
Uneven Cake Layers
If your cake layers come out uneven, you can level them using a serrated knife. Carefully trim the tops of the layers to create a flat surface. This will ensure that your cake stacks neatly and looks professional.
Crumbly Cake Layers
If your cake layers are crumbly, it may be due to overmixing the batter or baking the cake for too long. Ensure that you mix the batter just until the ingredients are combined and check the cake for doneness using a toothpick.
Storing and Serving
Storing: This cake can be stored in an airtight container in the refrigerator for up to five days. If you need to store it for longer, consider freezing the unfrosted cake layers. Wrap them tightly in plastic wrap and aluminum foil before freezing. When ready to use, thaw the layers overnight in the refrigerator.
Serving: For the best flavor and texture, serve the cake at room temperature. Remove it from the refrigerator about 30 minutes before serving. This will allow the frosting to soften and the flavors to meld together beautifully.
Conclusion
Creating a Salted Caramel Chocolate Cake from scratch is a labor of love that pays off in every delicious bite. This cake, with its rich chocolate layers and luscious salted caramel frosting, is sure to become a favorite in your baking repertoire. Whether you’re making it for a special celebration or simply to indulge in a decadent dessert, the satisfaction of making and enjoying this cake is unmatched.
Remember to take your time and enjoy the process. Baking is as much about the journey as it is about the final product. With each step, from mixing the batter to frosting the cake, you’re creating something special. So roll up your sleeves, gather your ingredients, and get ready to create a cake that’s sure to impress and delight. Happy baking!


