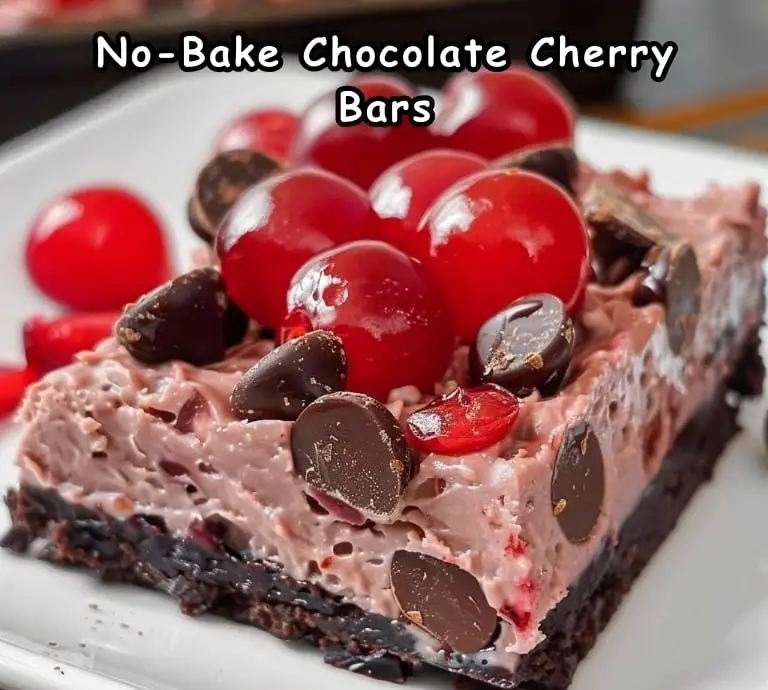
No-bake desserts are a lifesaver, especially when you need to whip up something delicious without spending too much time in the kitchen. These No-Bake Chocolate Cherry Bars are a prime example of how simple ingredients can come together to create a dessert that’s both decadent and easy to prepare. With an Oreo cookie crust, a creamy chocolate cherry cheesecake filling, and a topping of mini chocolate chips, these bars are sure to impress anyone who takes a bite. Here’s how you can make this delightful treat.
Ingredients
Crust:
- 24 Oreo cookies, crushed
- ¼ cup (½ stick, 57 g) butter, melted
Filling:
- 8 ounces cream cheese, softened
- 1 cup confectioners’ sugar
- 1 can (21 ounces) cherry pie filling
- 1¼ cups semi-sweet mini chocolate chips, divided
- 1 cup whipped cream
Instructions
Step 1: Prepare the Crust
- Spray the Baking Dish: Begin by spraying a 7×11-inch baking dish with nonstick cooking spray. This will make it easier to remove the bars from the dish once they are set. Set the dish aside for now.
- Crush the Oreo Cookies: Place the Oreo cookies in a food processor and pulse until they form fine crumbs. If you don’t have a food processor, you can put the cookies in a ziplock bag and crush them with a rolling pin until they reach the desired consistency.
- Combine with Butter: Transfer the crushed Oreo cookies to a medium mixing bowl. Add the melted butter and stir until the mixture is well combined and all the cookie crumbs are coated with butter.
- Form the Crust: Pour the cookie mixture into the prepared baking dish. Use the back of a spoon or the bottom of a glass to firmly press the crumbs into the bottom of the dish, creating an even crust. Once the crust is formed, place the dish in the refrigerator to chill while you prepare the filling.
Step 2: Make the Filling
- Beat the Cream Cheese: In a large mixing bowl, beat the softened cream cheese with an electric mixer until it is light and fluffy. This step is crucial for ensuring that the filling is smooth and creamy.
- Add Confectioners’ Sugar and Cherry Pie Filling: Gradually add the confectioners’ sugar to the cream cheese, beating continuously until well combined. Then, add the cherry pie filling and mix until the ingredients are fully incorporated.
- Fold in Chocolate Chips: Gently fold in 1 cup of the mini chocolate chips, reserving the remaining ¼ cup for the topping. Be careful not to overmix, as you want the chocolate chips to be evenly distributed throughout the filling.
- Incorporate Whipped Cream: Using a spatula, gently fold in the whipped cream until the mixture is smooth and well combined. The whipped cream adds a light, airy texture to the filling.
- Spread the Filling: Remove the crust from the refrigerator and pour the filling mixture over it. Use a spatula to spread the filling evenly over the crust, ensuring it reaches all the edges and corners.
Step 3: Add the Finishing Touches
- Top with Remaining Chocolate Chips: Sprinkle the reserved ¼ cup of mini chocolate chips evenly over the top of the filling. This adds a nice crunch and extra chocolate flavor to the bars.
- Chill: Place the baking dish in the refrigerator and let it chill for at least 4 hours, or until the filling is firm and cold. This step allows the flavors to meld together and ensures that the bars hold their shape when cut.
Step 4: Serve and Enjoy
- Slice and Serve: Once the bars are fully set, use a sharp knife to cut them into squares or rectangles. Serve them chilled for the best texture and flavor.
- Storage: These bars can be stored in an airtight container in the refrigerator for up to 5 days. They also freeze well, making them a great make-ahead dessert option. To freeze, wrap each bar individually in plastic wrap and place them in a freezer-safe bag or container. Thaw in the refrigerator before serving.
Tips for Making the Perfect No-Bake Chocolate Cherry Bars
- Softening the Cream Cheese: Make sure the cream cheese is at room temperature before you begin. This ensures that it blends smoothly with the other ingredients, resulting in a creamy filling without lumps.
- Chilling the Whipped Cream: If you’re using homemade whipped cream, make sure it’s well-chilled before folding it into the filling. This helps maintain the light and airy texture of the filling.
- Even Crust: When pressing the Oreo crumbs into the baking dish, ensure they are packed tightly and evenly. This creates a sturdy base that holds together when you slice the bars.
- Refrigeration Time: Don’t rush the chilling process. Allowing the bars to chill for the full 4 hours ensures that the filling sets properly and the flavors meld together beautifully.
- Storing the Bars: These bars can be stored in an airtight container in the refrigerator for up to 5 days. They also freeze well, making them a great make-ahead dessert option.
Variations and Additions
- Different Flavors: Feel free to experiment with different flavors of pie filling. Blueberry, raspberry, or strawberry pie filling can all be delicious alternatives to cherry.
- Nutty Crunch: For added texture, sprinkle some chopped nuts, such as almonds or pecans, over the top of the bars along with the chocolate chips.
- White Chocolate: Swap out the semi-sweet chocolate chips for white chocolate chips for a different flavor profile. White chocolate pairs beautifully with cherries and cream cheese.
- Drizzle of Chocolate: For an extra touch of decadence, drizzle melted chocolate over the top of the bars before chilling. This adds a rich chocolate layer that complements the cherry filling perfectly.
- Layer of Ganache: Add a layer of chocolate ganache over the filling for an ultra-rich version of these bars. Simply melt chocolate with a bit of cream and spread it over the top before adding the final sprinkle of chocolate chips.
Conclusion
No-Bake Chocolate Cherry Bars are the ultimate dessert for chocolate and cherry lovers. With their creamy cheesecake filling, crunchy Oreo crust, and bursts of cherry flavor, these bars are sure to impress at any gathering. Plus, they’re incredibly easy to make, requiring no oven time at all. Perfect for hot summer days or anytime you want a decadent treat without the fuss, these bars are a must-try. Whether you’re serving them at a party, bringing them to a potluck, or just enjoying them at home, they’re guaranteed to be a hit. So, go ahead and give this recipe a try—you’ll never look at no-bake desserts the same way again!
Nutrition Information
- Serving Size: 1 piece
- Calories: 472 kcal
- Total Fat: 27 g
- Saturated Fat: 15 g
- Cholesterol: 48 mg
- Sodium: 272 mg
- Total Carbohydrates: 55 g
- Dietary Fiber: 3 g
- Sugars: 40 g
- Protein: 4 g
These No-Bake Chocolate Cherry Bars are a delightful, indulgent treat that combines the rich flavors of chocolate and cherries with the creamy texture of cheesecake. Easy to make and even easier to enjoy, this dessert is perfect for any occasion and will surely become a favorite in your household.


