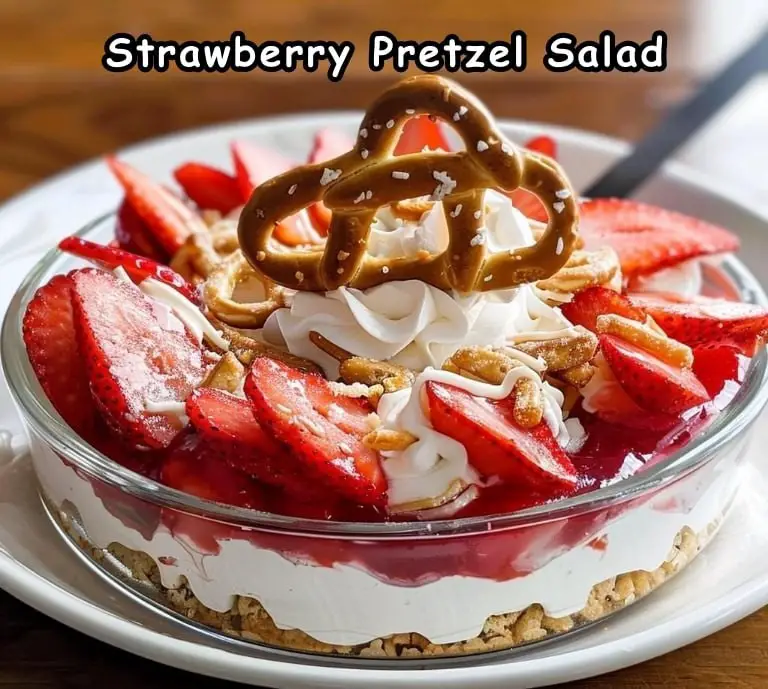
Strawberry Pretzel Salad is a delightful and refreshing dessert that perfectly balances sweet and salty flavors. This classic treat features a crunchy pretzel crust, a creamy whipped cream cheese layer, fresh strawberries, and a shimmering strawberry Jell-O topping. It’s a versatile dessert that’s perfect for picnics, potlucks, and family gatherings. Its unique combination of textures and flavors makes it a standout dish that everyone will love.
In this comprehensive guide, we’ll walk you through each step of creating this delicious Strawberry Pretzel Salad. From preparing the pretzel crust to making the whipped cream cheese layer and topping it with fresh strawberries and Jell-O, you’ll find all the tips and tricks needed to ensure your dessert turns out perfectly every time. Whether you’re an experienced baker or a novice in the kitchen, this recipe is straightforward and rewarding, promising a dessert that will be quickly devoured.
Ingredients Breakdown
To achieve the perfect Strawberry Pretzel Salad, it’s essential to use high-quality ingredients and understand their roles in the recipe.
Main Ingredients:
- Pretzel Crust:
- 4 cups salted pretzels: Provides a crunchy and salty base for the dessert.
- ¾ cup (1 ½ sticks / 170 g) unsalted butter, melted: Binds the pretzel crumbs together to form the crust.
- ¼ cup granulated sugar: Adds a touch of sweetness to the crust.
- Whipped Cream Cheese Layer:
- 4 ounces cream cheese, room temperature: Adds a rich and creamy texture.
- ½ cup (100 g) granulated sugar: Sweetens the cream cheese layer.
- 2 cups (476 g) heavy cream: Whipped to add lightness and volume.
- ½ teaspoon vanilla extract: Enhances the flavor with a subtle vanilla note.
- 1 pinch kosher salt: Balances the sweetness and enhances the flavors.
- Jell-O Layer:
- 1 package (6 ounces) strawberry Jell-O mix: Provides a sweet and fruity layer.
- 2 cups boiling water: Dissolves the Jell-O crystals.
- Topping:
- 16 ounces fresh strawberries, sliced: Adds a fresh and juicy element to the dessert.
Step-by-Step Instructions
Preparing the Pretzel Crust
- Preheat the Oven: Preheat your oven to 375°F (190°C). Spray a 9×13-inch baking dish with cooking spray or line it with parchment paper to ensure easy removal of the dessert.
- Crush the Pretzels: Place 4 cups of salted pretzels into a food processor. Pulse until the pretzels are crushed to a fine crumb. Alternatively, you can place the pretzels in a ziplock bag and crush them with a rolling pin until fine crumbs form.
- Combine with Butter and Sugar: In a medium bowl, combine the pretzel crumbs, ¾ cup of melted unsalted butter, and ¼ cup of granulated sugar. Mix until all the crumbs are evenly coated with the butter and the mixture resembles wet sand.
- Form the Crust: Pour the pretzel mixture into the prepared baking dish. Using the back of a spoon or a flat-bottomed glass, press the crumbs firmly into the bottom of the dish to form an even crust.
- Bake the Crust: Bake in the preheated oven for 10 minutes. Remove from the oven and allow the crust to cool completely.
Making the Whipped Cream Cheese Layer
- Chill the Mixing Bowl: Before you begin, place the bowl and whisk attachment from your stand mixer into the freezer to chill for about 15 minutes. This helps the cream whip up faster and with more volume.
- Mix the Cream Cheese and Sugar: In the chilled mixing bowl, add 4 ounces of room temperature cream cheese and ½ cup of granulated sugar. Mix on medium-high speed until fully combined and no lumps remain.
- Whip the Cream: With the mixer off, pour in 2 cups of heavy cream. Resume mixing on medium speed until soft peaks form (peaks that droop slightly). Stop the mixer and scrape the bottom of the bowl with a rubber spatula to incorporate all of the cream cheese.
- Continue Whipping: Resume mixing on medium speed until stiff peaks form. Stiff peaks refer to the whipped cream peaks that stand straight up and hold their shape firmly. Finally, add in ½ teaspoon of vanilla extract and a pinch of salt, being careful not to overmix.
- Spread the Layer: Spread the whipped cream mixture evenly over the cooled pretzel crust. Transfer the dish to the refrigerator to chill for at least an hour.
Preparing the Jell-O Layer
- Dissolve the Jell-O: In a large mixing bowl, combine 1 package (6 ounces) of strawberry Jell-O mix with 2 cups of boiling water. Whisk until all of the Jell-O crystals have completely dissolved.
- Chill the Jell-O: Place the Jell-O mixture in the refrigerator to cool slightly, but not set completely. This usually takes about 15-20 minutes.
Assembling the Strawberry Pretzel Salad
- Add the Strawberries: Once the cream cheese layer is set, arrange 16 ounces of sliced fresh strawberries evenly over the top.
- Pour the Jell-O: Carefully pour the cooled Jell-O mixture over the strawberries. Ensure the Jell-O covers all the strawberries evenly.
- Chill Until Set: Place the dish back in the refrigerator and chill until the Jell-O layer is completely set, about 4-6 hours.
- Serve: Once set, slice the Strawberry Pretzel Salad into squares and serve chilled.
Serving Suggestions
Strawberry Pretzel Salad is a versatile dessert that can be enjoyed in various settings. Here are a few serving suggestions to make your dessert experience even more delightful:
- Classic Presentation: Serve squares of the dessert on decorative plates, allowing the layers to shine.
- Garnish with Mint: Add a sprig of fresh mint on top for a burst of color and a touch of elegance.
- Add Fresh Fruit: Garnish with additional fresh strawberries or a mix of berries for extra freshness.
- Pair with Coffee or Tea: Enjoy a piece of the salad with a cup of hot coffee or tea for a delightful treat.
- Holiday Touch: Decorate the top with festive sprinkles or edible glitter for special occasions and holidays.
Tips for Perfect Strawberry Pretzel Salad
- Properly Chill the Bowl: Start with a cold mixing bowl and whisk attachment to help the cream whip up faster and with more volume.
- Even Mixing: Mix the cream cheese and sugar thoroughly to ensure a smooth, creamy layer.
- Layering: Ensure each layer is evenly spread and set before adding the next to maintain distinct layers.
- Chill Thoroughly: Allow the dessert to chill completely in the refrigerator for the best texture and flavor.
- Fresh Strawberries: Use fresh, ripe strawberries for the best flavor and texture.
Customizing Your Strawberry Pretzel Salad
One of the joys of making homemade desserts is the ability to customize them to your taste. Here are a few ideas for variations and additions:
- Different Fruits: Use other fruit fillings, such as raspberry or blueberry Jell-O, and corresponding fresh fruits for a different flavor.
- Nutty Addition: Sprinkle chopped nuts, such as pecans or almonds, over the cream cheese layer for added crunch and flavor.
- Chocolate Twist: Add a layer of melted chocolate between the pretzel crust and the cream cheese layer for an extra layer of indulgence.
- Spiced Up: Add a teaspoon of cinnamon or a pinch of nutmeg to the pretzel crust for a warm, spiced flavor.
- Healthy Twist: Use a light cream cheese and sugar substitute for a slightly healthier version.
Nutritional Information
For those mindful of their dietary intake, here’s a basic nutritional breakdown per serving (approximately 1 piece):
- Calories: 458kcal
Keep in mind that the nutritional values may vary based on the exact quantities and brands of ingredients used.
Conclusion
Strawberry Pretzel Salad is a delightful and easy-to-make dessert that combines the salty crunch of pretzels with the creamy richness of a whipped cream cheese layer and the sweet tang of fresh strawberries and Jell-O. Perfect for any occasion, this dessert is sure to become a favorite in your recipe collection.
By following the detailed steps and tips provided in this guide, you can create a Strawberry Pretzel Salad that is perfect every time. Whether you’re making it for a family gathering, a holiday feast, or simply as a treat for yourself, this dessert is sure to impress and satisfy.
So, the next time you’re in the mood for something sweet and refreshing, give this Strawberry Pretzel Salad recipe a try. Your taste buds will thank you, and you’ll have a delicious dessert to share with friends and family.
Happy baking!


