Introduction
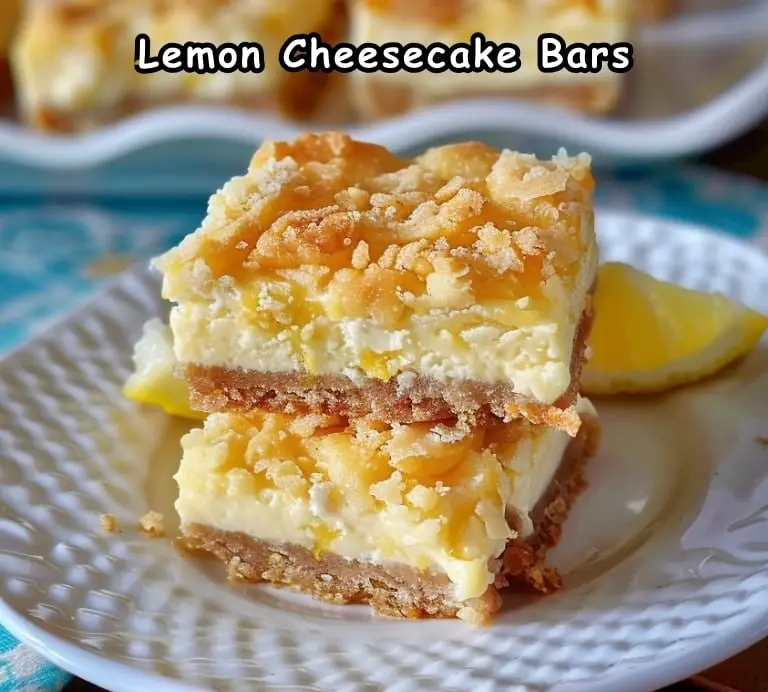
Cheesecake bars are the perfect dessert for those who love the rich, creamy texture of cheesecake but prefer a more portable, easy-to-serve option. These Lemon Cheesecake Bars bring a refreshing twist to the classic cheesecake, combining the zesty flavor of lemon with the smoothness of cream cheese and the crunch of a graham cracker crust. They’re ideal for parties, potlucks, or just as a special treat at home. Follow this detailed guide to create a batch of these delightful bars that will surely impress your family and friends.
Ingredients
For the Crust:
- 1 1/2 cups finely crushed graham crackers
- 3 tablespoons unsalted butter, melted
For the Filling:
- 2 (8-oz.) packages cream cheese, at room temperature
- 1/2 cup sugar
- 1 teaspoon fresh lemon zest
- 1 tablespoon lemon juice
- 1 teaspoon vanilla extract
- 2 large eggs
Instructions
Step 1: Preheat the Oven and Prepare the Pan
Preheat Your Oven: Begin by preheating your oven to 350°F (175°C). Proper preheating ensures that the oven reaches the desired temperature before you start baking, allowing the cheesecake to cook evenly.
Prepare the Baking Pan: Line an 8-inch square baking pan with foil, allowing some overhang on the sides for easy removal later. Lightly grease the foil with cooking spray to prevent sticking. This preparation helps in getting clean slices and makes it easier to lift the cheesecake out of the pan once it’s set.
Step 2: Make the Graham Cracker Crust
Crush the Graham Crackers: Finely crush graham crackers using a food processor, or place them in a zip-top bag and crush with a rolling pin until you get a sand-like consistency.
Combine with Butter: In a medium bowl, stir together the crushed graham crackers and melted butter until the crumbs are evenly coated. The butter helps to bind the crumbs together and adds flavor.
Press into the Pan: Transfer the graham cracker mixture into the prepared baking pan. Press the crumbs firmly into an even layer using the back of a spoon or the bottom of a measuring cup. This forms the base of your cheesecake bars. Ensure it’s tightly packed to avoid a crumbly crust.
Step 3: Prepare the Cheesecake Filling
Beat the Cream Cheese: In the bowl of a stand mixer fitted with the paddle attachment, beat the cream cheese on medium speed until smooth and creamy. This step is crucial to avoid lumps in the filling.
Add Sugar, Lemon Zest, Lemon Juice, and Vanilla: Add the sugar, fresh lemon zest, lemon juice, and vanilla extract to the cream cheese. Beat until well combined. The lemon zest and juice add a bright, fresh flavor that balances the richness of the cream cheese.
Incorporate the Eggs: Add the eggs one at a time, beating on low speed between each addition until fully incorporated. Be careful not to overmix, as this can incorporate too much air and cause cracks in the cheesecake.
Pour Over Crust: Pour the cheesecake mixture over the prepared crust, spreading it into an even layer with a spatula. Ensure the filling is smooth and level for even baking.
Step 4: Bake the Cheesecake
Bake: Place the pan in the preheated oven and bake for 20 to 25 minutes, or until the center is almost set. The cheesecake should be slightly jiggly in the center but firm around the edges. This slight jiggle will firm up as it cools.
Cool Completely: Remove the cheesecake from the oven and let it cool completely in the pan on a wire rack. This initial cooling helps the cheesecake set properly.
Step 5: Refrigerate and Serve
Chill the Cheesecake: Once cooled, cover the pan with plastic wrap and refrigerate for at least 3 hours, or overnight if possible. Chilling allows the flavors to meld and the cheesecake to firm up, making it easier to cut into clean bars.
Slice and Serve: When ready to serve, use the foil overhang to lift the cheesecake out of the pan and onto a cutting board. Slice into bars with a sharp knife, wiping the knife with a warm, damp cloth between cuts for clean edges. Enjoy the creamy, tangy goodness of these lemon cheesecake bars!
Tips for Perfect Lemon Cheesecake Bars
- Room Temperature Ingredients: Ensure the cream cheese and eggs are at room temperature before mixing. This helps them blend more smoothly and prevents lumps in the filling.
- Don’t Overmix: When incorporating the eggs, mix on low speed and just until combined. Overmixing can incorporate too much air, leading to cracks in the cheesecake.
- Even Baking: To prevent overbaking, start checking the cheesecake a few minutes before the recommended time. The center should have a slight jiggle when you gently shake the pan.
- Proper Chilling: Chilling the cheesecake for several hours or overnight ensures it sets properly and enhances the flavor and texture.
Variations
This versatile recipe can be customized in various ways to suit your tastes:
- Berry Topping: Add a layer of fresh berries or berry compote on top of the cheesecake before serving for an extra burst of flavor and color.
- Chocolate Swirl: Swirl in melted chocolate into the cheesecake batter before baking for a chocolate lemon combination.
- Nut Crust: Substitute some of the graham crackers with finely chopped nuts like almonds or pecans for a nutty twist.
Storing and Serving
Refrigeration: Store any leftover cheesecake bars in an airtight container in the refrigerator. They will stay fresh for up to 5 days. Chilling keeps the cheesecake firm and flavorful.
Freezing: For longer storage, you can freeze the cheesecake bars. Wrap individual bars in plastic wrap and place them in a freezer-safe container or zip-top bag. They can be frozen for up to three months. Thaw in the refrigerator before serving.
Serving Suggestions: These cheesecake bars are delicious on their own, but you can also serve them with a dollop of whipped cream, a sprinkle of powdered sugar, or a drizzle of berry sauce. They make a great addition to dessert tables at parties and gatherings.
Health and Safety
Safe Handling: Ensure that all ingredients, especially dairy products like cream cheese and eggs, are fresh and stored correctly to avoid spoilage and foodborne illnesses. Always wash your hands and utensils thoroughly before and after handling the ingredients.
Allergy Considerations: This recipe contains dairy and gluten, which can be allergens for some people. If serving to a group, consider making a dairy-free, gluten-free version if needed. There are many alternatives available, such as dairy-free cream cheese and gluten-free graham crackers, that can be used to accommodate dietary restrictions.
Conclusion
These Lemon Cheesecake Bars are a delightful, refreshing take on the classic cheesecake. With a buttery graham cracker crust and a creamy, zesty filling, they’re sure to become a favorite dessert for any occasion. This recipe is straightforward and perfect for both novice and experienced bakers. By following this detailed guide, you’ll create a batch of cheesecake bars that not only taste incredible but also look beautiful and impressive on any dessert table.
Whether you’re making them for a special occasion, as a gift, or just because, these cheesecake bars are sure to bring joy and satisfaction. Enjoy making and sharing this delicious treat with your family and friends. Happy baking!


