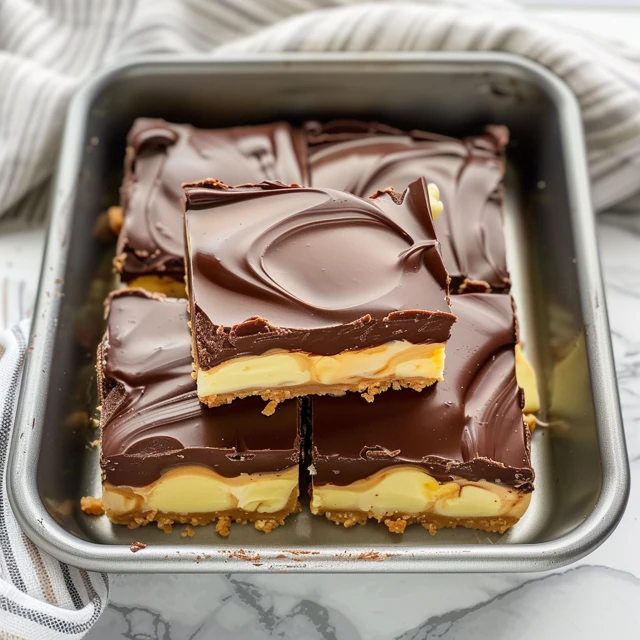
Boston Cream Pie Fudge: A Decadent Twist on a Classic Dessert
Boston Cream Pie is a timeless dessert that has been delighting taste buds for generations. The combination of creamy custard, rich chocolate, and tender cake is irresistible. Now, imagine transforming this classic dessert into a decadent fudge. Boston Cream Pie Fudge captures all the delicious elements of the original dessert in a smooth, melt-in-your-mouth treat. This article will guide you through the process of making this indulgent fudge, step by step, ensuring you achieve perfect results every time.
Ingredients
To make Boston Cream Pie Fudge, you will need the following ingredients:
For the Fudge:
- 2 cups granulated sugar
- 4 oz. unsalted butter
- ½ cup heavy cream
- 2 cups white chocolate chips
- 3 tablespoons Bird’s Custard Powder
- 1/2 teaspoon vanilla extract
- 3 tablespoons unsweetened cocoa powder
- 7-ounce jar marshmallow crème
For the Topping:
- 6 oz. semisweet chocolate, finely chopped
- 1 1/2 tablespoons vegetable oil

Equipment Needed
Before you begin, make sure you have the necessary equipment:
- Large heavy-bottomed saucepan
- Candy thermometer
- Wooden spoon
- Whisk
- 8×8 inch pan
- Parchment paper
- Baking spray
- Medium heat-proof bowl
- Medium saucepan
- Small bowl
Step-by-Step Instructions
1. Prepare the Pan
Line an 8×8 inch pan with parchment paper, leaving an overhang on the sides. This will help you lift the fudge out later. Coat the parchment paper with baking spray to ensure the fudge doesn’t stick.
2. Cook the Sugar Mixture
In a large heavy-bottomed saucepan, combine the granulated sugar, unsalted butter, and heavy cream. Bring the mixture to a boil over medium heat, stirring constantly to prevent burning.
3. Reach the Soft Ball Stage
Once the mixture is boiling, attach a candy thermometer to the side of the saucepan. Reduce the heat slightly, maintaining a gentle boil. Continue to cook the mixture for 7-10 minutes, stirring constantly, until the thermometer reads 234°F (soft ball stage). This temperature is crucial for achieving the perfect fudge texture.
4. Add the White Chocolate
Remove the saucepan from the heat and add the white chocolate chips. Stir vigorously with a wooden spoon until the chocolate has melted completely and the mixture is smooth. The heat from the sugar mixture will melt the chocolate quickly.
5. Incorporate the Marshmallow Crème
Add the jar of marshmallow crème to the mixture. Stir until the marshmallow crème is fully blended, creating a smooth and creamy base for your fudge.

6. Mix in the Custard Powder and Vanilla
Add the Bird’s Custard Powder and vanilla extract to the mixture. Stir until everything is well combined and smooth. The custard powder will give the fudge its characteristic Boston Cream Pie flavor.
7. Layer the Fudge
Pour 2/3 of the fudge mixture into the prepared pan, spreading it evenly. This will form the custard layer of the fudge.
8. Prepare the Chocolate Fudge
Immediately whisk the unsweetened cocoa powder into the remaining 1/3 of the fudge mixture. Mix until fully combined and smooth. This will be the chocolate layer of your fudge.
9. Swirl the Fudge Layers
Pour the chocolate fudge mixture on top of the custard fudge in the pan. Using a knife, swirl the two layers together to create a marbled effect. This not only looks beautiful but also ensures each bite has a bit of both flavors.
10. Cool and Cut the Fudge
Allow the fudge to cool to room temperature. Once cooled, lift the fudge out of the pan using the parchment overhang and place it on a cutting board. Cut the fudge into squares or rectangles, depending on your preference.
11. Prepare the Chocolate Topping
In a medium heat-proof bowl, combine the finely chopped semisweet chocolate and vegetable oil. Set the bowl over a medium saucepan of barely simmering water. Stir until the chocolate is melted and smooth. Transfer the melted chocolate to a small bowl and let it cool for about 15 minutes.
12. Dip the Fudge
Dip the top of each piece of fudge into the melted chocolate, allowing any excess to drip off. Place the dipped fudge pieces on a parchment-lined baking sheet. Let the chocolate set for about an hour at room temperature.
Tips for Success
- Use a Candy Thermometer: Accurate temperature measurement is crucial when making fudge. A candy thermometer ensures you reach the soft ball stage without undercooking or burning the mixture.
- Stir Constantly: To prevent the sugar mixture from burning, stir continuously while cooking. Use a wooden spoon, as it doesn’t conduct heat and is gentle on the saucepan.
- Quickly Mix the Layers: Work quickly when adding the cocoa powder to the remaining fudge mixture and swirling the layers. Fudge sets rapidly, and you want to achieve a marbled effect before it hardens.
- Proper Cooling: Allow the chocolate topping to cool for the recommended time before dipping the fudge. This prevents the chocolate from melting the fudge and ensures a smooth, even coating.
Serving and Storage
Boston Cream Pie Fudge is best enjoyed at room temperature. Store the fudge in an airtight container, separating layers with parchment paper to prevent sticking. It will keep for up to two weeks at room temperature or can be refrigerated for longer storage.
Variations
- Dark Chocolate Topping: For a richer flavor, use dark chocolate instead of semisweet chocolate for the topping.
- Flavored Fudge: Experiment with different flavors by adding extracts to the fudge base. Almond or coconut extracts can add a unique twist.
- Decorative Toppings: Sprinkle chopped nuts, sprinkles, or sea salt on top of the dipped fudge before the chocolate sets for added texture and flavor.
A Bit of History: The Origins of Boston Cream Pie
Boston Cream Pie has an interesting history that adds to its charm. This iconic dessert was first created in the 1850s at the Parker House Hotel in Boston, Massachusetts, which is now known as the Omni Parker House. Chef Sanzian, the hotel’s French chef, is credited with its invention. Interestingly, despite its name, Boston Cream Pie is actually a cake. The original version consisted of two layers of sponge cake filled with vanilla custard and topped with a chocolate glaze, resembling a pie, hence the name.

Why Fudge?
Transforming Boston Cream Pie into fudge is a modern twist that offers a portable, shareable, and irresistibly creamy confection. Fudge is known for its rich texture and intense flavor, making it an ideal medium to showcase the beloved combination of custard and chocolate. This version retains the classic flavors while introducing a new texture that melts in your mouth.
Perfect for Any Occasion
Boston Cream Pie Fudge is a versatile treat that fits well in various settings:
- Holiday Parties: Its rich and indulgent nature makes it a standout dessert for holiday gatherings.
- Gift Giving: Packaged beautifully, this fudge makes a thoughtful and delicious gift for friends, family, or colleagues.
- Potlucks and Picnics: Easy to transport and share, this fudge is a hit at potlucks and picnics.
- Dessert Tables: It adds variety to any dessert table, offering a unique option among cakes, cookies, and pies.
Troubleshooting Common Issues
Making fudge can sometimes be tricky. Here are a few common issues and how to address them:
- Grainy Texture: If your fudge turns out grainy, it’s likely due to the sugar not dissolving completely. Ensure you stir continuously and maintain the correct temperature.
- Soft or Runny Fudge: If the fudge doesn’t set properly, it may not have reached the soft ball stage. Use a reliable candy thermometer and be patient.
- Separating Layers: To ensure the chocolate layer adheres well to the custard fudge, don’t let the base layer cool completely before adding the chocolate. This helps the layers bond better.
Customizing Your Fudge
Personalizing your Boston Cream Pie Fudge can be a fun way to experiment with flavors and textures. Here are a few ideas:
- Nutty Delight: Add finely chopped nuts such as almonds, pecans, or walnuts to the fudge mixture for a crunchy contrast.
- Fruit Infusion: Incorporate dried fruits like cranberries, raisins, or apricots to add a chewy texture and a hint of tartness.
- Spiced Up: Mix in a pinch of cinnamon or nutmeg to the fudge base for a warm, spicy note that complements the custard flavor.
Healthier Alternatives
While Boston Cream Pie Fudge is an indulgent treat, there are ways to make it a bit healthier without sacrificing flavor:
- Reduced Sugar: Use a sugar substitute designed for baking to lower the sugar content.
- Dark Chocolate: Opt for dark chocolate with a high cocoa content for the topping, which contains less sugar and more antioxidants.
- Lower Fat: Replace heavy cream with a lower-fat alternative or use reduced-fat butter to cut down on fat content.
Serving Suggestions
To elevate your presentation, consider these serving suggestions:
- Garnish with Fresh Berries: Fresh berries such as strawberries, raspberries, or blueberries can add a burst of color and a fresh flavor contrast to the rich fudge.
- Whipped Cream Dollop: A small dollop of whipped cream on top of each piece of fudge can mimic the classic Boston Cream Pie look.
- Chocolate Drizzle: Instead of dipping, drizzle the melted chocolate over the cut fudge pieces for a decorative effect.
Final Thoughts
Creating Boston Cream Pie Fudge is more than just making a sweet treat; it’s about honoring a classic dessert while embracing the creativity of modern confectionery. This recipe brings together the best of both worlds, offering a rich, creamy, and visually appealing fudge that’s sure to impress.
Whether you’re a seasoned baker or a novice in the kitchen, this fudge recipe is designed to be accessible and rewarding. By following the detailed steps and incorporating the tips provided, you’ll be able to create a confection that not only tastes amazing but also captures the essence of the beloved Boston Cream Pie.
So, gather your ingredients, set up your kitchen, and embark on this delicious journey. Your efforts will be rewarded with a batch of Boston Cream Pie Fudge that’s perfect for sharing, gifting, or simply enjoying as a well-deserved treat. Happy cooking!


