Cherry Pretzel Squares: A Delightful Dessert for Any Occasion
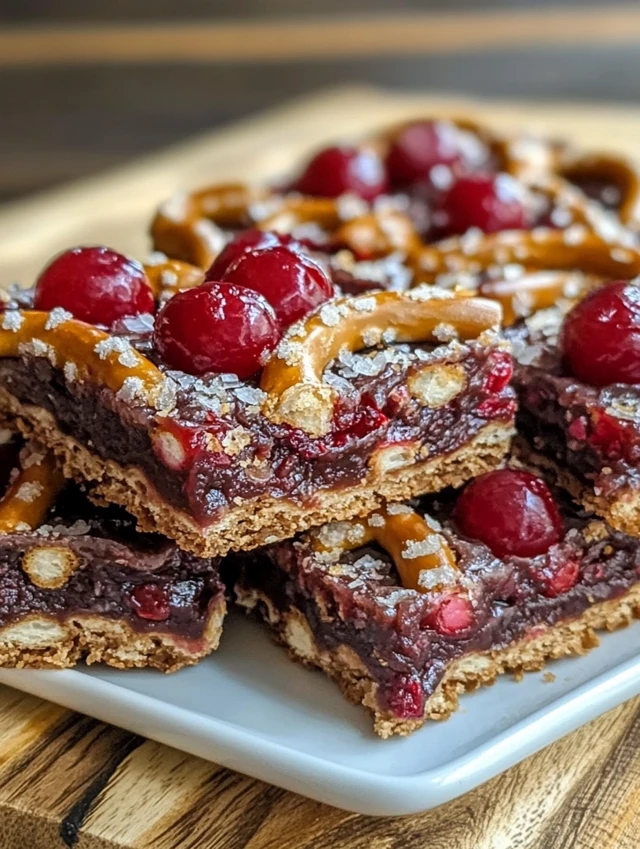
Cherry Pretzel Squares are a delightful treat that perfectly combines the sweet and tart flavors of cherries with the salty crunch of pretzels. This dessert is not only visually appealing but also incredibly satisfying, making it a fantastic choice for any occasion, from family gatherings to birthday parties. With a creamy, luscious filling sandwiched between layers of crunchy pretzels and topped with vibrant cherry fruit filling, this recipe is bound to become a favorite in your dessert repertoire.
Ingredients
To create this mouthwatering dessert, you will need the following ingredients:
- 3 cups pretzels, chopped
- 3/4 cup brown sugar
- 1/2 cup butter, melted
- 1 8-ounce package cream cheese, softened
- 1 cup powdered sugar
- 1 8-ounce container frozen whipped dessert topping, thawed
- 2 21-ounce cans LUCKY LEAF® Regular, Premium, or Organic Cherry Fruit Filling or Topping

Instructions
Step 1: Preheat the Oven
Begin by preheating your oven to 350°F (175°C). Preheating the oven ensures that it reaches the right temperature before you start baking, which is crucial for achieving the perfect texture for your pretzel crust.
Step 2: Prepare the Pretzel Crust
In a medium-sized bowl, combine the chopped pretzels, brown sugar, and melted butter. The combination of these ingredients will create a crunchy, sweet, and salty base for your dessert. Mix the ingredients thoroughly until the pretzels are well coated with the butter and sugar.
Spread half of this pretzel mixture evenly in the bottom of a 9×13-inch baking pan. Press down firmly to create an even layer. This will form the bottom crust of your Cherry Pretzel Squares. Bake the crust in the preheated oven for 10 minutes. Once done, remove it from the oven and let it cool completely.
Step 3: Prepare the Cream Cheese Layer
While the pretzel crust is cooling, it’s time to prepare the creamy layer. In a large mixing bowl, combine the softened cream cheese and powdered sugar. Use an electric mixer to blend the ingredients until they are smooth and creamy. This mixture should be free of lumps for the best texture.
Next, gently fold in the thawed whipped dessert topping. Folding, rather than mixing vigorously, helps maintain the light and airy texture of the whipped topping. This step ensures that your cream cheese layer will be fluffy and delicious.
Step 4: Assemble the Layers
Once the pretzel crust has cooled, spread half of the cream cheese mixture over the crust. Use a spatula to ensure an even layer. This creamy layer adds a rich and tangy contrast to the crunchy pretzel crust.
Step 5: Add the Cherry Fruit Filling
Now, it’s time to add the star ingredient: the cherry fruit filling. Open the two cans of LUCKY LEAF® Cherry Fruit Filling or Topping and spread it evenly over the cream cheese layer. The vibrant red cherries will not only add a pop of color but also provide a burst of fruity flavor in every bite.
Step 6: Final Cream Cheese Layer and Topping
Spread the remaining half of the cream cheese mixture over the cherry layer. Make sure to spread it evenly to cover the cherries completely. This final cream cheese layer will add another dimension of creaminess to your dessert.
To finish, sprinkle the remaining pretzel mixture over the top. This will add an extra crunch and a touch of sweetness to the final product.
Step 7: Chill and Serve
Refrigerate the Cherry Pretzel Squares for at least 4 hours before serving. Chilling the dessert allows the layers to set and the flavors to meld together beautifully. Once ready, cut into squares and serve chilled.

Tips for the Perfect Cherry Pretzel Squares
- Chopping the Pretzels: Ensure the pretzels are chopped finely but not too small. You want to maintain a bit of crunch for texture.
- Cream Cheese Softness: Make sure the cream cheese is softened to room temperature before mixing. This will make it easier to blend with the powdered sugar and result in a smoother mixture.
- Folding Technique: When folding in the whipped topping, do it gently to maintain the airy texture. Over-mixing can deflate the whipped topping.
- Refrigeration Time: Don’t rush the refrigeration step. Allowing the dessert to chill for at least 4 hours is crucial for the layers to firm up and for the flavors to develop fully.
Variations and Customizations
- Fruit Filling: While cherry is a classic choice, you can experiment with other fruit fillings like blueberry, strawberry, or raspberry. Each fruit will bring its own unique flavor profile to the dessert.
- Nuts: Add a layer of chopped nuts, such as pecans or walnuts, for extra crunch and a nutty flavor.
- Chocolate: Drizzle melted chocolate over the top layer before refrigerating for a decadent twist.
- Graham Cracker Crust: For a different base, you can use a graham cracker crust instead of pretzels. This will result in a sweeter and more traditional dessert.
Why Cherry Pretzel Squares are a Crowd-Pleaser
Balanced Flavors: The combination of sweet, salty, creamy, and tangy flavors makes this dessert incredibly well-balanced. Each bite offers a delightful contrast that keeps you coming back for more.
Texture Contrast: The crunchy pretzel crust, creamy cheese layer, and juicy cherry topping provide a satisfying texture contrast. This makes each bite interesting and enjoyable.
Visual Appeal: The vibrant red cherry filling against the creamy white cheese layer and golden-brown pretzel crust creates a visually appealing dessert that’s perfect for any occasion.
Ease of Preparation: Despite its impressive appearance and taste, Cherry Pretzel Squares are relatively easy to prepare. The steps are straightforward, and the ingredients are readily available.
Versatility: This dessert is versatile and can be customized to suit different tastes and preferences. Whether you stick to the classic cherry version or experiment with other flavors, it’s sure to be a hit.


