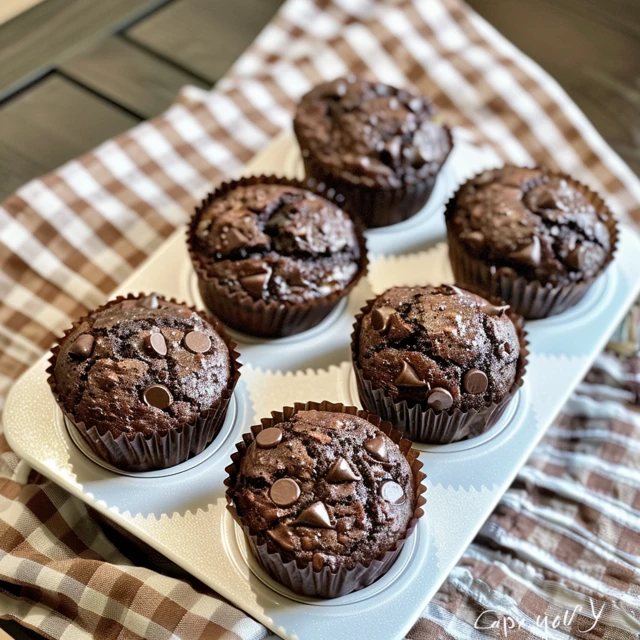
Bakery-Style Chocolate Chip Muffins: A Step-by-Step Guide to Perfection
There’s something irresistibly comforting about a warm, freshly baked muffin, especially when it’s bursting with chocolate chips. The allure of bakery-style chocolate chip muffins lies in their golden-brown tops, soft and moist centers, and the rich, melty pockets of chocolate that make every bite a delight. This comprehensive guide will walk you through the process of making these delectable treats, ensuring you achieve bakery-quality results in your own kitchen.
Ingredients and Their Importance
Before we dive into the baking process, let’s take a closer look at the ingredients and their roles in creating the perfect muffin.
Dry Ingredients
- All-purpose flour (3 cups or 375g): This forms the base of the muffin, providing structure. It’s important to spoon and level the flour to avoid dense muffins.
- Baking powder (3 teaspoons) and baking soda (1/2 teaspoon): These leavening agents are crucial for giving the muffins their rise and fluffy texture.
- Salt (1/2 teaspoon): Enhances flavor.
- Ground cinnamon (1 teaspoon) and optional ground nutmeg (1/8 teaspoon): These spices add a subtle warmth and depth of flavor.

Wet Ingredients
- Unsalted butter (1/3 cup or 5 tablespoons; 71g), melted and slightly cooled: Adds richness and a buttery flavor.
- Vegetable oil (1/3 cup or 80ml): Keeps the muffins moist. Alternatives like canola oil or melted coconut oil work well too.
- Granulated sugar (1 cup or 200g): Sweetens the muffins and helps with browning.
- Large eggs (2), at room temperature: Bind the ingredients together and contribute to the structure.
- Sour cream or yogurt (1/3 cup or 80g), at room temperature: Adds moisture and a slight tang, enhancing the muffin’s tenderness.
- Milk (1 cup or 240ml), at room temperature: Buttermilk or whole milk are ideal for their richness, but any milk can be used.
- Pure vanilla extract (1 teaspoon): Adds depth and enhances the overall flavor.
The Star Ingredient
- Semi-sweet chocolate chips (1 and 1/2 cups or 270g): The key to those gooey, chocolatey pockets. A mix of regular and mini chocolate chips can create a delightful texture variation.
The Baking Process
Step 1: Preparation
Begin by preheating your oven to 425°F (218°C). This initial high temperature helps the muffins rise quickly, creating those beautiful domed tops. Generously grease a jumbo 6-count muffin pan with butter or nonstick spray, or line it with muffin liners. Setting this up first ensures you’re ready to go as soon as your batter is mixed.
Step 2: Mixing the Dry Ingredients
In a large bowl, whisk together the flour, baking powder, baking soda, salt, cinnamon, and nutmeg. This ensures that the leavening agents and spices are evenly distributed throughout the flour, which is crucial for even rising and flavor in each muffin.
Step 3: Combining the Wet Ingredients
In a separate bowl, whisk the melted butter, oil, and sugar together until well combined. Add the eggs one at a time, whisking until fully incorporated. Next, add the sour cream, milk, and vanilla extract. The mixture will be pale yellow and slightly thick.
Step 4: Bringing It All Together
Pour the wet ingredients into the dry ingredients. Using a silicone spatula or wooden spoon, fold the ingredients together until just combined. It’s important not to overmix the batter; overmixing can lead to tough, dense muffins. The batter should be thick and slightly lumpy. Finally, gently fold in the chocolate chips, ensuring they are evenly distributed.
Step 5: Baking the Muffins
Divide the batter evenly between the prepared muffin cups, filling them all the way to the top. This will help create those large, bakery-style muffin tops. Sprinkle each muffin with coarse sugar if desired; this adds a delightful crunch.
Place the muffins in the oven and bake at 425°F (218°C) for 5 minutes. Without opening the oven, reduce the temperature to 350°F (177°C) and continue baking for 25-26 minutes. This two-step baking process helps the muffins rise quickly and then cook through evenly. The muffins are done when the tops are lightly golden brown and a toothpick inserted into the center comes out clean.
Step 6: Cooling and Storing
Allow the muffins to cool in the pan for 10 minutes before transferring them to a wire rack to cool completely. This resting period allows the muffins to set, making them easier to handle.
Store any leftover muffins in an airtight container at room temperature for up to 5 days, or refrigerate them for up to a week. Muffins can also be frozen for up to 3 months. To freeze, wrap each muffin individually in plastic wrap and place them in a freezer bag. Thaw them in the refrigerator overnight or on the counter for a few hours before enjoying.

Tips for Success
- Room Temperature Ingredients: Ensure all refrigerated items are at room temperature before mixing. This helps the batter combine more smoothly and results in a better texture.
- Measuring Flour: Spoon the flour into your measuring cup and level it off with a knife. This prevents adding too much flour, which can make the muffins dense.
- Mixing: Avoid overmixing the batter. Stir until the dry ingredients are just incorporated into the wet ingredients. A few lumps are okay.
- Filling the Muffin Cups: Fill each muffin cup to the brim to achieve those high, bakery-style domes.
- Baking Time: Start with the high temperature to help the muffins rise, then lower it to finish baking without drying them out.
Variations and Customizations
- Standard or Mini Muffins: For standard size muffins, use a 12-count muffin pan and bake at 425°F for 5 minutes, then reduce to 350°F and bake for an additional 15 minutes. For mini muffins, bake at 350°F for 11-13 minutes.
- Mix-ins: Experiment with different mix-ins like white chocolate chips, nuts, or dried fruit. Adjust the quantity based on your preference.
- Flavor Enhancements: Add a teaspoon of almond extract or a tablespoon of espresso powder to the batter for a unique twist.
Troubleshooting Common Issues
Even with the best recipes, sometimes things don’t go as planned. Here are some common issues you might encounter and how to fix them:
Muffins Not Rising Properly
- Check Your Leavening Agents: Ensure your baking powder and baking soda are fresh. These ingredients lose their potency over time.
- Proper Oven Temperature: Make sure your oven is fully preheated before baking. The initial high temperature is crucial for helping the muffins rise quickly.
- Overmixing the Batter: Mixing the batter too much can cause the muffins to become dense and not rise well. Mix until just combined.
Dry or Dense Muffins
- Measure Ingredients Accurately: Too much flour can make muffins dry. Spoon and level your flour rather than scooping it directly from the bag.
- Don’t Overbake: Keep an eye on your muffins, especially during the final minutes of baking. They should be golden brown on top and a toothpick inserted in the center should come out clean or with a few moist crumbs.
- Fat Content: Ensure you’re using full-fat sour cream or yogurt and whole milk or buttermilk for the best texture.
Muffins Sticking to the Pan
- Grease the Pan Well: Use nonstick spray or butter to generously grease your muffin tin or use high-quality muffin liners.
- Cool Before Removing: Allow the muffins to cool in the pan for about 10 minutes before transferring them to a wire rack. This helps them firm up and makes them easier to remove.
Unevenly Cooked Muffins
- Even Batter Distribution: Make sure to fill each muffin cup evenly with batter. This ensures all muffins bake at the same rate.
- Rotate the Pan: If your oven has hot spots, rotate the muffin pan halfway through baking to ensure even cooking.
Serving Suggestions
Bakery-style chocolate chip muffins are versatile and can be enjoyed in various ways:
- Breakfast Treat: Pair a warm muffin with your morning coffee or tea for a delightful start to your day.
- Afternoon Snack: Enjoy a muffin with a glass of milk or a smoothie for a satisfying mid-day pick-me-up.
- Dessert: Serve the muffins with a scoop of vanilla ice cream or a dollop of whipped cream for a simple yet delicious dessert.
- Brunch: These muffins make a great addition to any brunch spread. Serve them alongside fresh fruit, yogurt, and other pastries.

Nutritional Information
While bakery-style chocolate chip muffins are a treat, it’s always good to know what you’re consuming. Here’s a general idea of the nutritional content per jumbo muffin (assuming the recipe makes 6 jumbo muffins):
- Calories: Approximately 550
- Fat: 25g
- Saturated Fat: 10g
- Cholesterol: 70mg
- Sodium: 350mg
- Carbohydrates: 75g
- Fiber: 2g
- Sugar: 35g
- Protein: 8g
Keep in mind these values can vary based on the specific ingredients and brands used.
The Joy of Baking at Home
One of the greatest joys of baking at home is the ability to create something from scratch that rivals or even surpasses what you can buy at a bakery. These chocolate chip muffins are a testament to that. They are not only delicious but also customizable to your taste preferences.
Making It a Family Affair
Baking is also a wonderful activity to share with family and friends. Get the kids involved by letting them help measure ingredients or mix the batter. They can also add their favorite mix-ins or decorate the muffins with coarse sugar before baking.
Gifting Homemade Muffins
These muffins make a thoughtful and delicious gift. Package them in a decorative box or tin, and you have a homemade gift that’s sure to be appreciated. Perfect for holidays, birthdays, or just to brighten someone’s day.
Final Thoughts
Bakery-style chocolate chip muffins are a classic treat that never goes out of style. By following this detailed guide, you can create muffins that are moist, flavorful, and loaded with chocolate chips. Whether you’re a seasoned baker or a beginner, this recipe is straightforward and rewarding. The next time you’re craving a bakery-quality muffin, skip the trip and make them at home instead. You won’t be disappointed!
Happy baking, and enjoy every chocolatey bite of your delicious homemade muffins!


