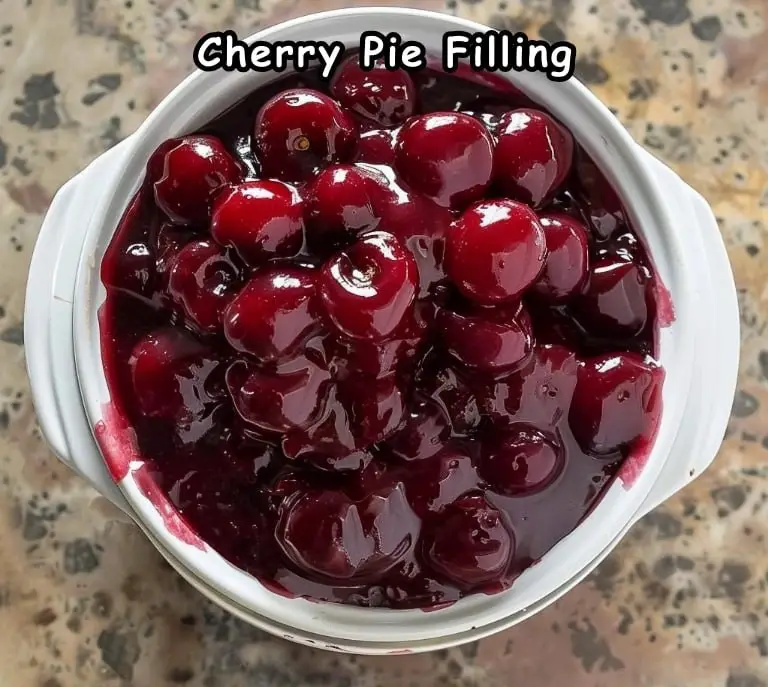
Cherry pie filling is a versatile and delicious ingredient that can elevate a wide range of desserts. Whether you’re making a classic cherry pie, a decadent cheesecake, or a simple ice cream topping, a homemade cherry pie filling adds a fresh, vibrant flavor that store-bought versions simply can’t match. Made with sweet red cherries, a touch of lemon juice, and just the right amount of sweetness, this filling is sure to become your go-to for all things cherry.
In this comprehensive guide, we will walk you through the steps of making a perfect homemade cherry pie filling. From selecting the best cherries to achieving the perfect consistency, you’ll find all the tips and tricks needed to create a filling that will impress your family and friends. Whether you’re an experienced baker or a novice in the kitchen, this recipe is straightforward and rewarding, promising a delicious addition to your dessert repertoire.
Ingredients Breakdown
To achieve the perfect cherry pie filling, it’s essential to use high-quality ingredients and understand their roles in the recipe.
Main Ingredients:
- 4 cups sweet red cherries, pitted (about 1½ pounds): The star ingredient, providing natural sweetness and juiciness.
- ¼ cup (32 g) cornstarch: Acts as a thickening agent to achieve the desired consistency.
- ¼ cup (62.5 g) water: Combines with cornstarch to create a slurry.
- ⅔ cup (133 g) granulated sugar: Sweetens the filling to balance the tartness of the cherries.
- 1 tablespoon lemon juice (preferably fresh squeezed): Adds a touch of acidity to enhance the flavor of the cherries.
Step-by-Step Instructions
Preparing the Cherries
- Pit the Cherries: If you haven’t pitted cherries before, this step might take some time. Using a cherry pitter is the most efficient way to pit cherries. If you don’t have one, you can use a straw or a small, sharp knife to remove the pits. Be sure to pit enough cherries to yield 4 cups.
Cooking the Cherries
- Cook the Cherries: In a medium saucepan over medium heat, add the pitted cherries. Cover the saucepan and cook, stirring frequently, until the cherries start releasing their natural juices and the contents begin to simmer. This process takes about 10-15 minutes.
Making the Cornstarch Slurry
- Prepare the Slurry: In a small mixing bowl, whisk together ¼ cup of cornstarch and ¼ cup of water until smooth. This cornstarch slurry will help thicken the cherry filling.
Combining Ingredients
- Add Slurry and Sweeteners: Reduce the heat to low and pour the cornstarch slurry into the simmering cherries. Add ⅔ cup of granulated sugar and 1 tablespoon of fresh lemon juice. Stir the mixture well to combine all the ingredients.
Thickening the Filling
- Thicken the Mixture: Increase the heat slightly and bring the mixture back to a simmer, stirring constantly. Continue cooking until the mixture has thickened, which should take about 1-2 minutes. Be careful not to overcook as it thickens quickly.
Cooling and Storing
- Cool the Filling: Remove the saucepan from the heat and allow the cherry pie filling to cool completely. Once cooled, you can use it immediately in your favorite dishes or store it for later use.
- Store the Filling: Transfer the cherry pie filling to an airtight container. Store it in the refrigerator for up to 4 days or freeze it for up to 3 months. If freezing, make sure to leave some space at the top of the container as the filling will expand when frozen.
Tips for Perfect Cherry Pie Filling
- Choose the Right Cherries: Sweet red cherries are ideal for this recipe. They provide a perfect balance of sweetness and tartness. If using sour cherries, you may need to adjust the amount of sugar.
- Pit Efficiently: Use a cherry pitter to speed up the process. If you don’t have one, a straw or a small knife can work, but it will take longer.
- Constant Stirring: Stir the filling constantly when adding the cornstarch slurry to prevent lumps and ensure even thickening.
- Cool Completely: Allow the filling to cool completely before using it in recipes. This helps it set and makes it easier to handle.
- Proper Storage: Store the filling in airtight containers to maintain its freshness. If freezing, make sure to leave room for expansion.
Uses for Cherry Pie Filling
Homemade cherry pie filling is incredibly versatile and can be used in a variety of desserts. Here are some ideas to get you started:
- Classic Cherry Pie: Use the filling in a traditional double-crust pie or a lattice-top pie for a beautiful presentation.
- Cheesecakes: Spoon the filling over a classic cheesecake for a burst of fruity flavor.
- Ice Cream Topping: Warm the filling slightly and drizzle it over vanilla ice cream for a simple yet delicious treat.
- Tarts and Galettes: Fill tart shells or free-form galettes with the cherry filling for an elegant dessert.
- Pancakes and Waffles: Use the filling as a topping for breakfast favorites like pancakes and waffles.
- Yogurt Parfaits: Layer the cherry filling with yogurt and granola for a refreshing and healthy dessert.
Nutritional Information
For those mindful of their dietary intake, here’s a basic nutritional breakdown per serving (approximately 1 cup of filling):
- Calories: 1039kcal
Keep in mind that the nutritional values may vary based on the exact quantities and brands of ingredients used.
Customizing Your Cherry Pie Filling
One of the joys of making homemade pie filling is the ability to customize it to your taste. Here are a few ideas for variations and additions:
- Spiced Up: Add a teaspoon of cinnamon or a pinch of nutmeg for a warm, spiced flavor.
- Alcohol Infusion: Stir in a tablespoon of cherry liqueur or brandy for an adult twist.
- Mixed Berries: Combine cherries with other berries like blueberries or raspberries for a mixed berry filling.
- Citrus Twist: Add some orange zest along with the lemon juice for a citrusy kick.
- Almond Extract: Add a teaspoon of almond extract for a complementary flavor that pairs beautifully with cherries.
Conclusion
Homemade cherry pie filling is a delightful and versatile ingredient that can elevate a wide range of desserts. Made with sweet red cherries, a touch of lemon juice, and just the right amount of sweetness, this filling is perfect for pies, cheesecakes, and much more.
By following the detailed steps and tips provided in this guide, you can create a cherry pie filling that is perfect every time. Whether you’re making it for a special occasion or simply to enjoy at home, this filling is sure to impress and satisfy.
So, the next time you’re in the mood for something sweet and fruity, give this homemade cherry pie filling recipe a try. Your taste buds will thank you, and you’ll have a delicious addition to your dessert repertoire.
Happy baking!


