Introduction
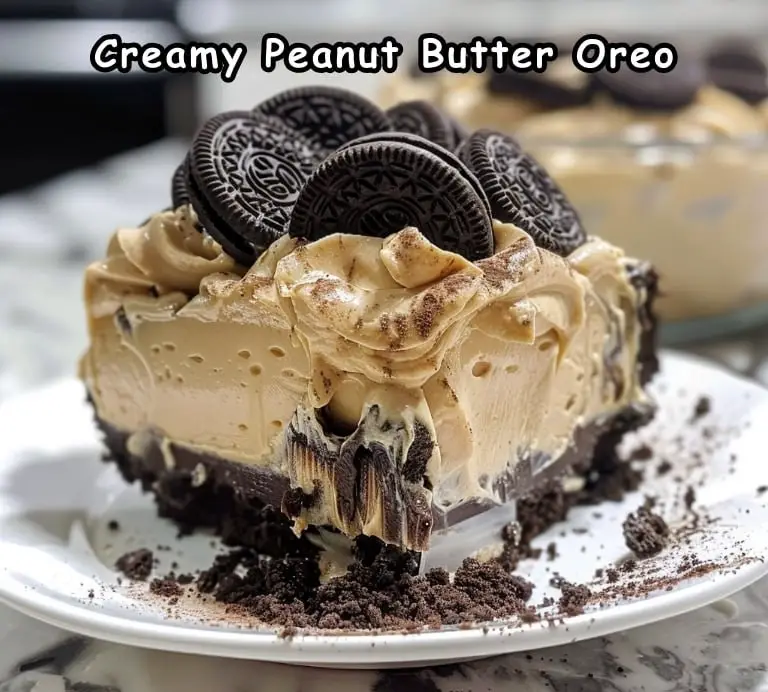
Desserts that combine rich flavors and varied textures are always a hit, and this No-Bake Peanut Butter Chocolate Mousse Pie is no exception. With a base of crunchy Oreo crust, a creamy peanut butter layer, and a decadent chocolate mousse topping, this dessert is a true crowd-pleaser. Topped with mini peanut butter cups and additional Oreo crumbs, it’s a dessert that looks as good as it tastes. This recipe is perfect for special occasions or simply when you want to treat yourself and your loved ones to something delicious and indulgent. Follow this detailed guide to create a dessert that will have everyone asking for seconds.
Ingredients
For the Oreo Crust:
- 30 Oreo cookies
- ½ cup (1 stick / 113 g) unsalted butter, melted
For the Cream Cheese Layer:
- 8 ounces cream cheese, softened
- ½ cup (128 g) creamy peanut butter
- 1 cup (125 g) confectioners’ sugar
- 8 ounces whipped topping
- 30 mini peanut butter cups, or 9 full-size, chopped
For the Chocolate Mousse Layer:
- 1 package (3.9 ounces) dry instant chocolate fudge pudding mix
- 2 cups (490 g) whole milk
- 8 ounces whipped topping
- ½ cup (63 g) confectioners’ sugar
Instructions
Step 1: Prepare the Oreo Crust
Crush the Oreo Cookies: Using a food processor, process 30 Oreo cookies until they become fine crumbs. It’s okay if there are a few chunks for added texture. Set aside ¼ cup of the crumbs for the topping.
Combine with Butter: In a large bowl, combine the remaining Oreo crumbs with the melted butter. Mix until the crumbs are fully coated with the butter, forming a consistent mixture.
Press into the Pan: Press the cookie mixture into the bottom of an ungreased 9-inch square dish. Use the back of a spoon or a flat-bottomed glass to press the mixture firmly and evenly. This forms the base of your dessert. Set aside.
Step 2: Make the Cream Cheese Layer
Beat the Cream Cheese: In a large bowl, use a hand mixer to beat the softened cream cheese until it is light and fluffy. This step is crucial to ensure a smooth and creamy layer.
Add Peanut Butter and Sugar: Add the creamy peanut butter and 1 cup of confectioners’ sugar to the cream cheese. Stir together until the mixture is smooth and well combined.
Fold in Whipped Topping: Gently fold in the whipped topping until the mixture is light and fluffy. Be careful not to overmix, as this can deflate the whipped topping.
Spread Over the Crust: Spread the cream cheese mixture over the prepared Oreo crust, smoothing it out into an even layer.
Add Peanut Butter Cups: Sprinkle the chopped mini peanut butter cups evenly over the cream cheese layer. This adds a delightful crunch and bursts of peanut butter flavor throughout the dessert.
Step 3: Make the Chocolate Mousse Layer
Prepare the Pudding Mix: In another large bowl, beat the milk, instant chocolate fudge pudding mix, and ½ cup of confectioners’ sugar until the mixture begins to thicken. This should take about 2 minutes.
Fold in Whipped Topping: Gently fold in the whipped topping until the mixture is fully combined and has a mousse-like consistency.
Spread Over Peanut Butter Cups: Spread the chocolate mousse mixture over the layer of chopped peanut butter cups, smoothing it into an even layer.
Add Final Toppings: Sprinkle the reserved ¼ cup of Oreo crumbs over the top of the chocolate mousse layer. This adds a final touch of crunch and ties the whole dessert together visually.
Step 4: Chill and Serve
Chill the Dessert: Cover the dish with plastic wrap or aluminum foil and refrigerate for at least 2 hours. This chilling time allows the layers to set and the flavors to meld together.
Serve: Once the dessert is thoroughly chilled, slice it into squares and serve. Each bite offers a perfect combination of crunchy, creamy, and rich chocolatey goodness.
Tips for Perfect No-Bake Peanut Butter Chocolate Mousse Pie
- Use Room Temperature Ingredients: Ensure that the cream cheese and peanut butter are at room temperature before mixing. This helps them blend more smoothly and prevents lumps in the cream cheese layer.
- Chill the Dessert: Allow the dessert to chill for at least 2 hours, or overnight if possible. This helps the layers set properly and makes slicing easier.
- Reserve Some Chocolate Chips: For an extra touch, you can reserve some chocolate chips to sprinkle on top along with the Oreo crumbs.
- Gentle Folding: When incorporating the whipped topping into both the cream cheese mixture and the chocolate mousse, fold gently to maintain the light, airy texture.
Variations
This versatile recipe can be customized in various ways to suit your tastes:
- Nutella Variation: Substitute the peanut butter with Nutella for a chocolate-hazelnut twist.
- Different Toppings: Use chopped Snickers, Kit Kats, or any other favorite candy bar instead of peanut butter cups.
- Flavor Additions: Add a teaspoon of espresso powder to the chocolate mousse for a mocha flavor.
- Healthier Options: Use light cream cheese, sugar-free pudding mix, and reduced-fat whipped topping for a lighter version of this dessert.
Storing and Serving
Refrigeration: Store any leftovers in an airtight container in the refrigerator. The dessert will stay fresh for up to 5 days. The flavors may even improve as they meld together over time.
Freezing: This dessert can also be frozen. Wrap individual slices in plastic wrap and place them in a freezer-safe container or zip-top bag. They can be frozen for up to 3 months. Thaw in the refrigerator before serving.
Serving Suggestions: This dessert is perfect on its own, but you can also serve it with a dollop of whipped cream or a scoop of vanilla ice cream for an extra indulgent treat. It’s an excellent addition to dessert tables at parties and gatherings.
Health and Safety
Safe Handling: Ensure that all dairy products, such as cream cheese and whipped topping, are fresh and stored correctly to avoid spoilage and foodborne illnesses. Always wash your hands and utensils thoroughly before and after handling dairy products.
Allergy Considerations: This recipe contains dairy, peanuts, and gluten, which can be allergens for some people. If serving to a group, consider making a dairy-free, nut-free, or gluten-free version if needed. There are many alternatives available, such as dairy-free cream cheese, almond butter, and gluten-free cookies, that can be used to accommodate dietary restrictions.
Conclusion
This No-Bake Peanut Butter Chocolate Mousse Pie is a rich, indulgent dessert that combines the creamy texture of cream cheese, the nutty flavor of peanut butter, and the rich decadence of chocolate mousse. The Oreo crust adds a delightful crunch, making each bite a perfect blend of flavors and textures. This recipe is straightforward and perfect for both novice and experienced bakers. By following this detailed guide, you’ll create a dessert that not only tastes incredible but also looks beautiful and impressive on any dessert table.
Whether you’re making it for a special occasion or just because, this peanut butter chocolate mousse pie is sure to bring joy and satisfaction. Enjoy making and sharing this delicious treat with your family and friends. Happy baking!


